Cute FTP
How To Use CuteFTP For FTP File Transfers
Are you're new to FTP and wondering how to set up CuteFTP to connect to your host? Below is a step by step tutorial that will help you connect and transfer files using the CuteFTP client.
CuteFTP is one of many FTP clients completely compatible with Neosurge hosting services. This documentation will teach you how to use CuteFTP for FTP transfers from your local computer to your web hosting account. You can download the latest version of CuteFTP here and follow along with this tutorial.
How To Videos for CuteFTP Listed in the Tutorial:
1. How to Configure Your Site in CuteFTP
2. How to Transfer Your Files Using CuteFTP
3. How to Manage Your Files in CuteFTP
4. How to Set Your Preferences in CuteFTP
After installing CuteFTP, on first launch you will be prompted by the FTP connection wizard. This is a great feature that simplifies setting up an FTP connection.
Setting Up CuteFTP Using The FTP Connection Wizard
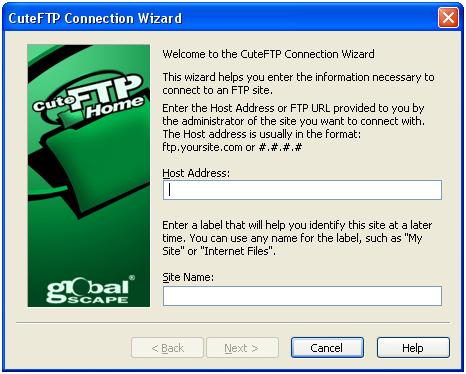
Step 1
1. First enter your host address:Host Address , yoursite.com.
2. The site name will automatically fill in what is typed for the host address. You may change this to a name you would like. It will not interfere with the FTP settings.
3. Click Next
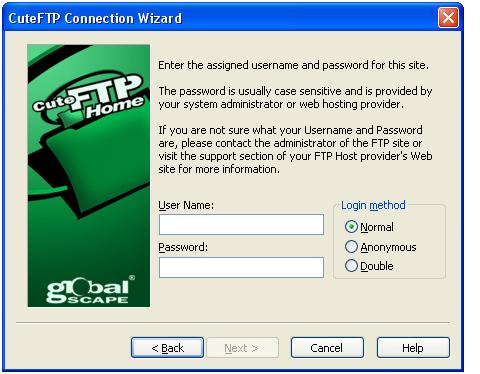
Step 2
4. Enter your Username and Password
5. Use the default login method: Normal
6. Click Next
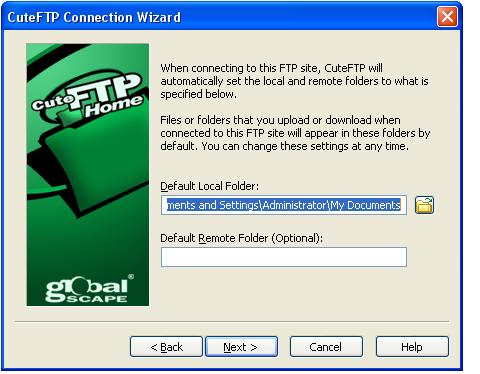
Step 3
7. Browse for the location where your website files are located on your local computer.
8. Leave the Default Local Folder blank.
9. Click Next
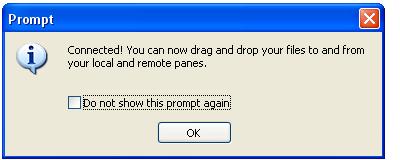
Step 4
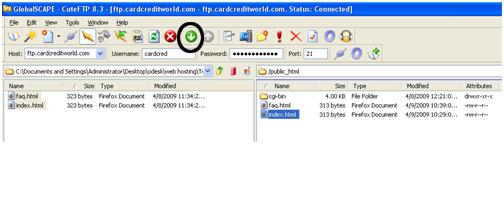
10. CuteFTP will connect to your FTP hosting account.
11. You will see a prompt saying your connected.
Video Tutorial - How to Set up a FTP Connection Using CuteFTP Site Manager
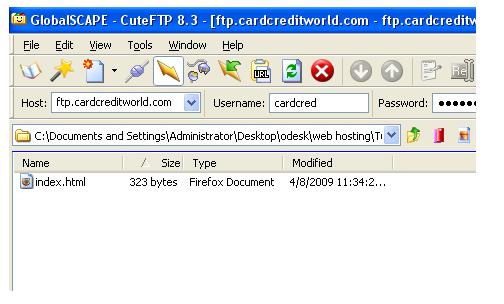
How To Transfer Files Using CuteFTP?
Step 1
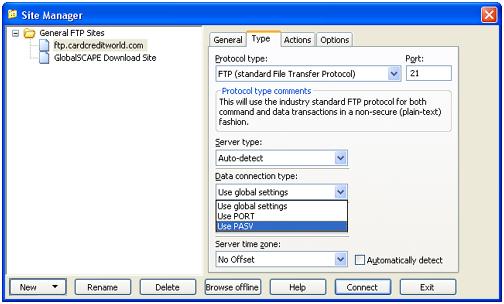
1. If you are using a router or behind a firewall router you may need to use passive mode to get a good, stable connection.
2. Open the Site Manager - book icon on the left side of the toolbar
3. Highlight your site name on the left hand side
4. Choose the Type Tab on the right hand side
5. Under Data connection type: choose Use PASV in the drop down box
6. Click Connect
Step 2
7. Use the drop down menu or the browse button on the left side to find the folder where your website files are located.
Step 3
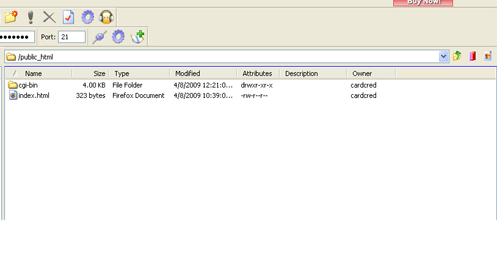
8. On the right side double click the public_html folder. This is the directory you will transfer your FTP files to for public viewing on the internet.
Step 4
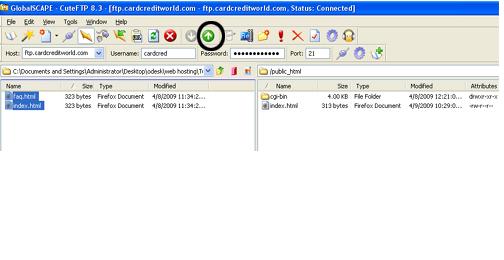
9. Next click and highlight the files on your local computer that you want to transfer through your FTP account to the hosting server. You can transfer multiple files by holding down the CTRL key and clicking on each file.
10. Drag them to the right side in the public_html directory or you can click the green upload button on the toolbar.
Step 5
11. You will be prompted by CuteFTP to replace the file if it already exists on the server.
12. Click Yes to replace.
Step 6
13. Downloading files from the server to your local computer using FTP is the reverse of uploading them.
14. Click and highlight all files you want to download.
15. Drag and drop them into the local folder or click the green download button on the toolbar.
Video Tutorial - How to Transfer Files Using CuteFTP
Managing Files, Permissions and CHMOD in CuteFTP
How To Create a Directory in CuteFTP
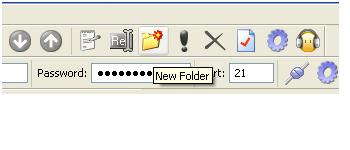
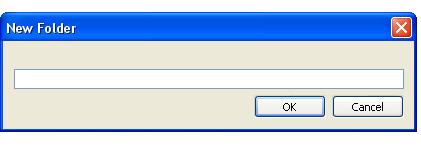
1. If you would like to create a directory on the hosting server, click the New Folder icon on the toolbar.
2. A box will pop up for you to enter the new folder name. Type the name of the new directory in this box.
3. Click OK and your new directory will be shown on the right side.
How To Rename a Directory in CuteFTP
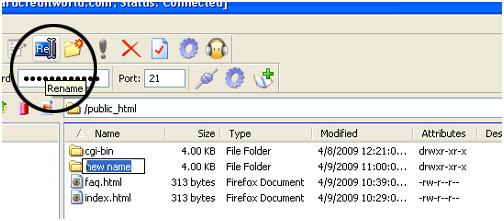
4. Renaming a directory in CuteFTP is exactly the same as renaming a folder on your desktop.
5. Click the folder you would like renamed.
6. Click the Rename Tab on the toolbar.
7. Type in the new name of the folder/directory.
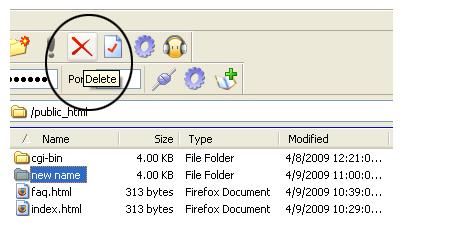
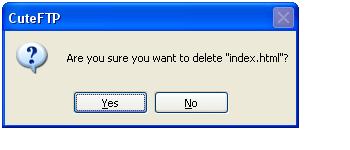
How To Delete a Directory in CuteFTP
8. Click and highlight the file or folder you would like to delete.
9. Click the red X on the toolbar to delete.
10. You will be prompted to confirm your deletion.
11. Choose Yes.
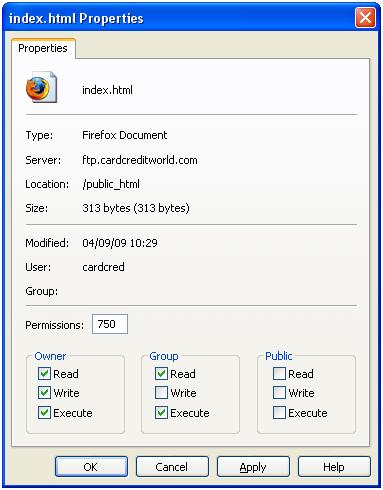
How to Locate File Permissions in CuteFTP
12. Click and highlight the file to change permissions on.
13. Right click with your mouse and choose Properties/CHMOD.
How to Set File Permissions CHMOD For Files and Folders in CuteFTP
14. There may be a time when you need to change the permissions on a file or folder in your hosting account. This commonly happens when working with script files and is better known as CHMOD.
15. To change the permissions click the appropriate box under the appropriate group.
16. If you already know the numeric value of the permissions you can directly enter it in the permissions box.


Was this answer helpful?
Also Read
Powered by WHMCompleteSolution